
Embracing Infrared
Article
Paul Gallagher
When we are out there taking photographs, we are essentially capturing reflected light. A small part of the light that we collect is infrared light that is invisible to the naked eye. The most common use for infrared photography is for industrial, military and scientific purposes, but when used in the landscape, the results are often fascinating and ‘other worldly’. Infrared photography was first used during WWII as it became a valuable tool in cutting through atmospheric haze, making it easier to identify buildings that reflect very little infrared light, so appearing dark in an open landscape. In the thirties and forties, the movie industry embraced infrared-sensitive films, and during the sixties, infrared images were used for album covers.
During the days of film, you could quite easily buy infrared film over the counter, load it in your camera and head out; but with the introduction of digital, this became a slightly trickier affair as digital camera manufacturers fit infrared cut-off filters to camera sensors which prevent the sensor from seeing infrared light which can produce rather odd effects when a photographer is aiming to make photographs look like the scene.
The process of getting your camera converted is quite straightforward, but certainly best left to the experts. Essentially, the infrared blocking filter is removed, allowing infrared light to be seen by the sensor, and in its place, a visible light filter is fitted. Prior to being able to get a camera converted, you had to place an infrared filter on the front of your camera lens. These are still available but let virtually no visible light through, making it very hard to compose, focus and introduce prohibitively long exposure times.
After you have had your camera converted to infrared, you can use it as you ordinarily would and even use autofocus. The only difference will be if your camera is mirrorless, you will see the world in real-time infrared, whereas a DSLR will present everything as colour. There are several choices of infrared filters that you can choose from that will give you subtly different results. The most common conversion is the 720nm conversion, which gives the best black and white images. A filter such as the 665nm is good if you would like to try colour infrared, which is quite popular, where the finished images will have blue skies and pink foliage. For me, the clarity and tonal range from the 720nm filter are perfect and offer a vast array of opportunities. The average cost of getting your digital camera converted to infrared is £350, and most people commit to this when they upgrade and convert their old camera body.
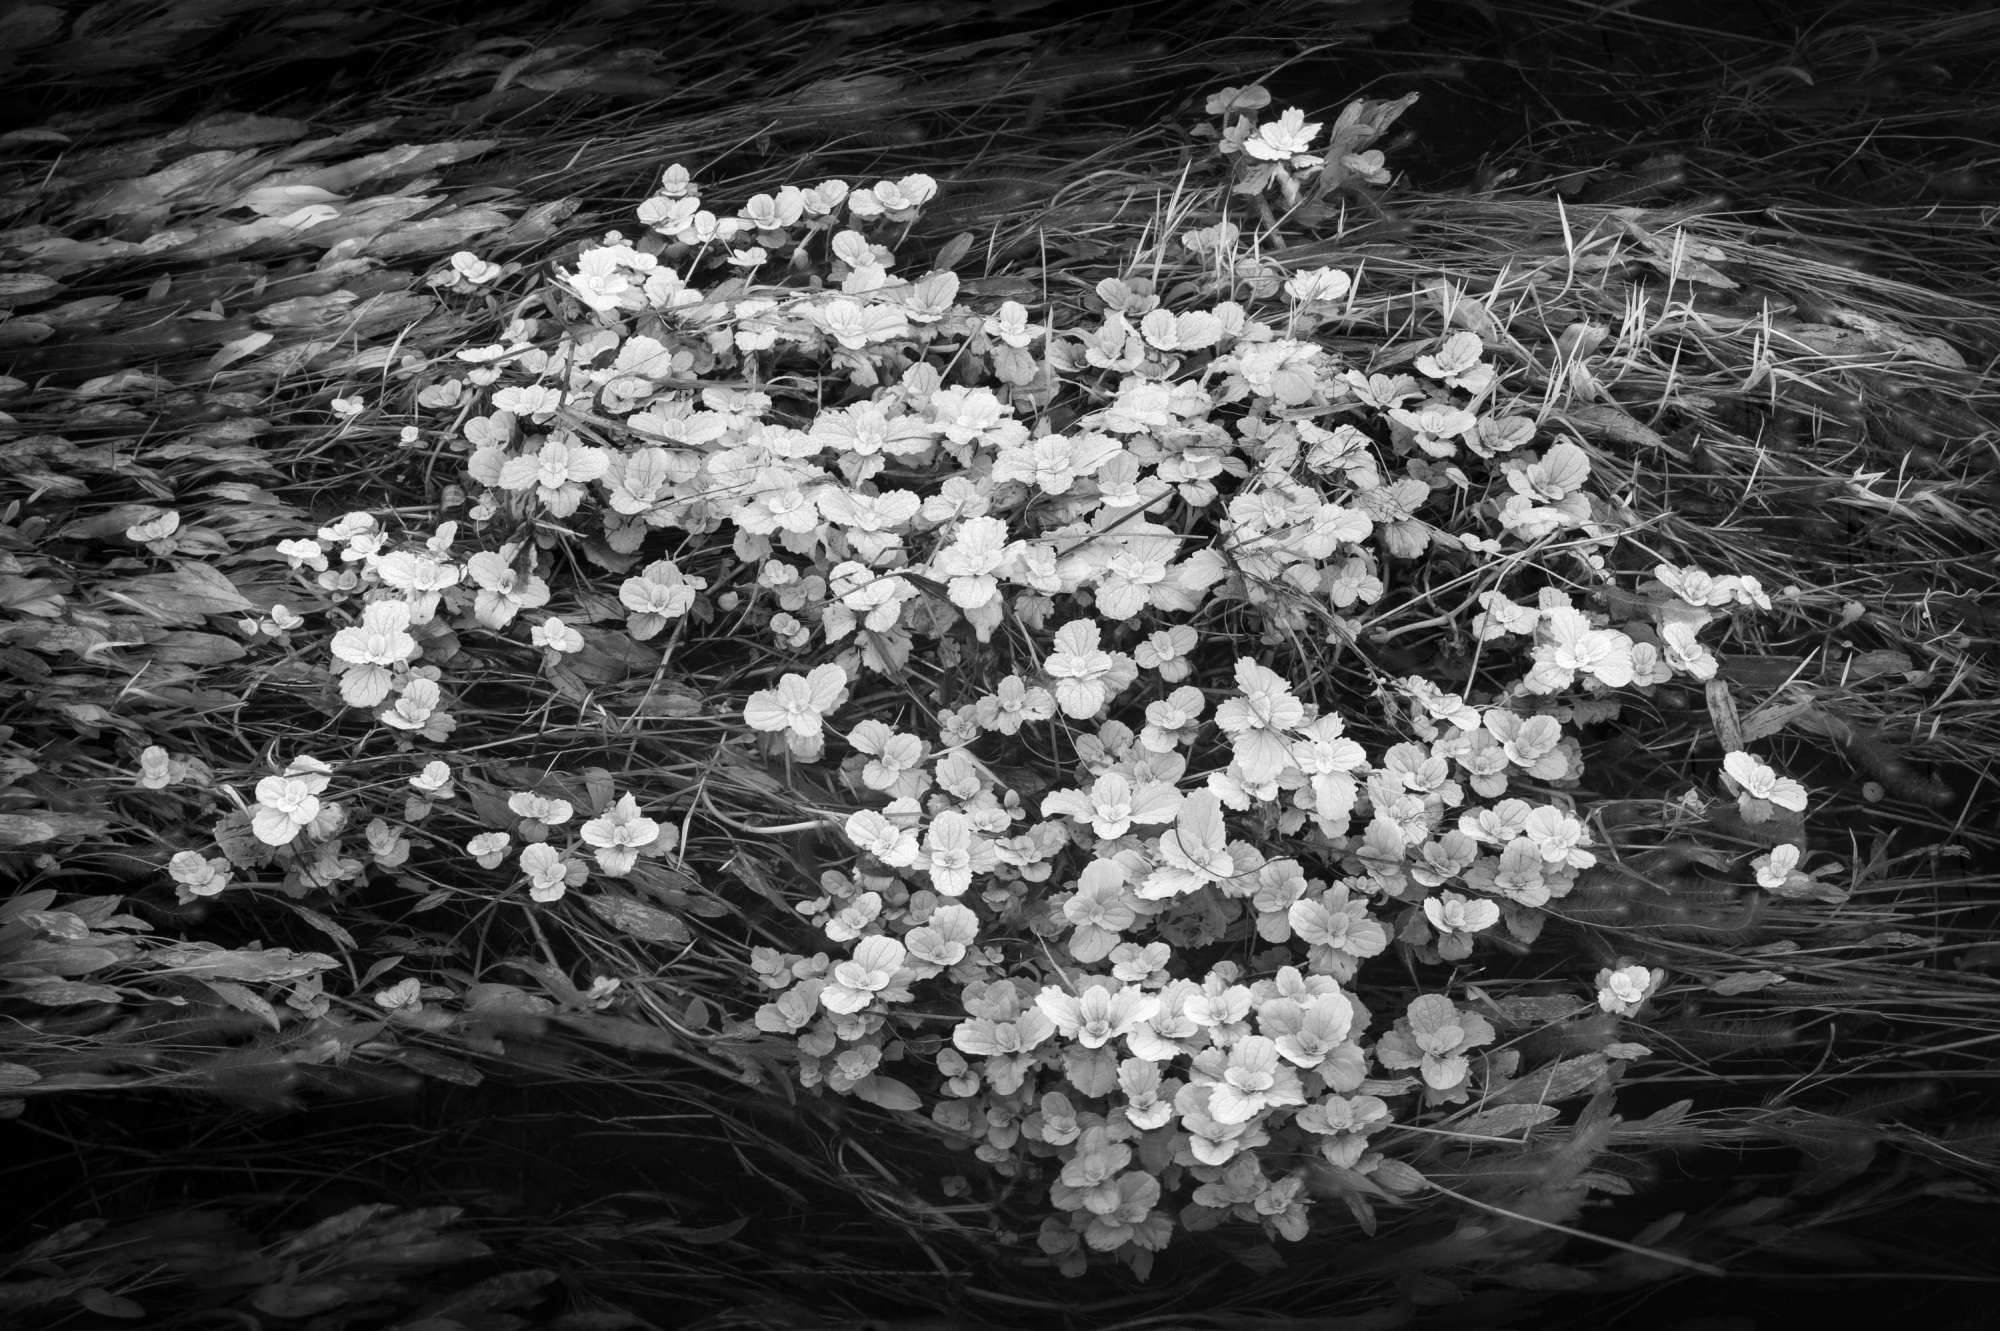
You may be asking what objects will look like if photographed in infrared. Firstly, water and blue skies absorb infrared light, so they appear very dark in the final image, hence that ‘classic’ infrared landscape image with almost total black skies and pure white clouds. Skin reflects a lot of infrared light, so the person in the picture will look very pale indeed and, in some cases, ghostly! The most obvious consideration in landscape photography is how foliage appears. Chlorophyll in green leaves and grasses reflects a great deal of in infrared light and is rendered in very pale tones.
About ten years ago, Advanced Camera Services contacted me and explained that they were converting DSLR cameras into infrared and asked whether I would like to try one out. Of course, I agreed, but when the camera arrived, all I could picture in my mind were the hard blacks and bleached whites of the infrared photographs I had made as a photography student many years ago. The camera I was sent was the Nikon D70 with a little 6‑megapixel sensor.
Having agreed to do this, one day I headed to a place where I often went as a student, Formby Point in Merseyside, with the sole intention of exploring infrared again. It was springtime, and there was a lot of sun about and fresh leaves on the trees and blue skies with white clouds, which, in general terms, is regarded as good for infrared photography. I arrived home, uploaded the files to my computer, and got exactly what I expected. The tones were very hard, high in contrast, and I was not particularly impressed or inspired to take the camera out again.
Later that year, I headed up to the northwest coast of Scotland. I was still carrying around the little D70 IR converted camera. I had had plenty of time to consider the results from my earlier trip to Formby Point, and the conclusions I came to where if I could subdue the contrast of the infrared image, then possibly it would produce photographs that were in some way pleasing to me.
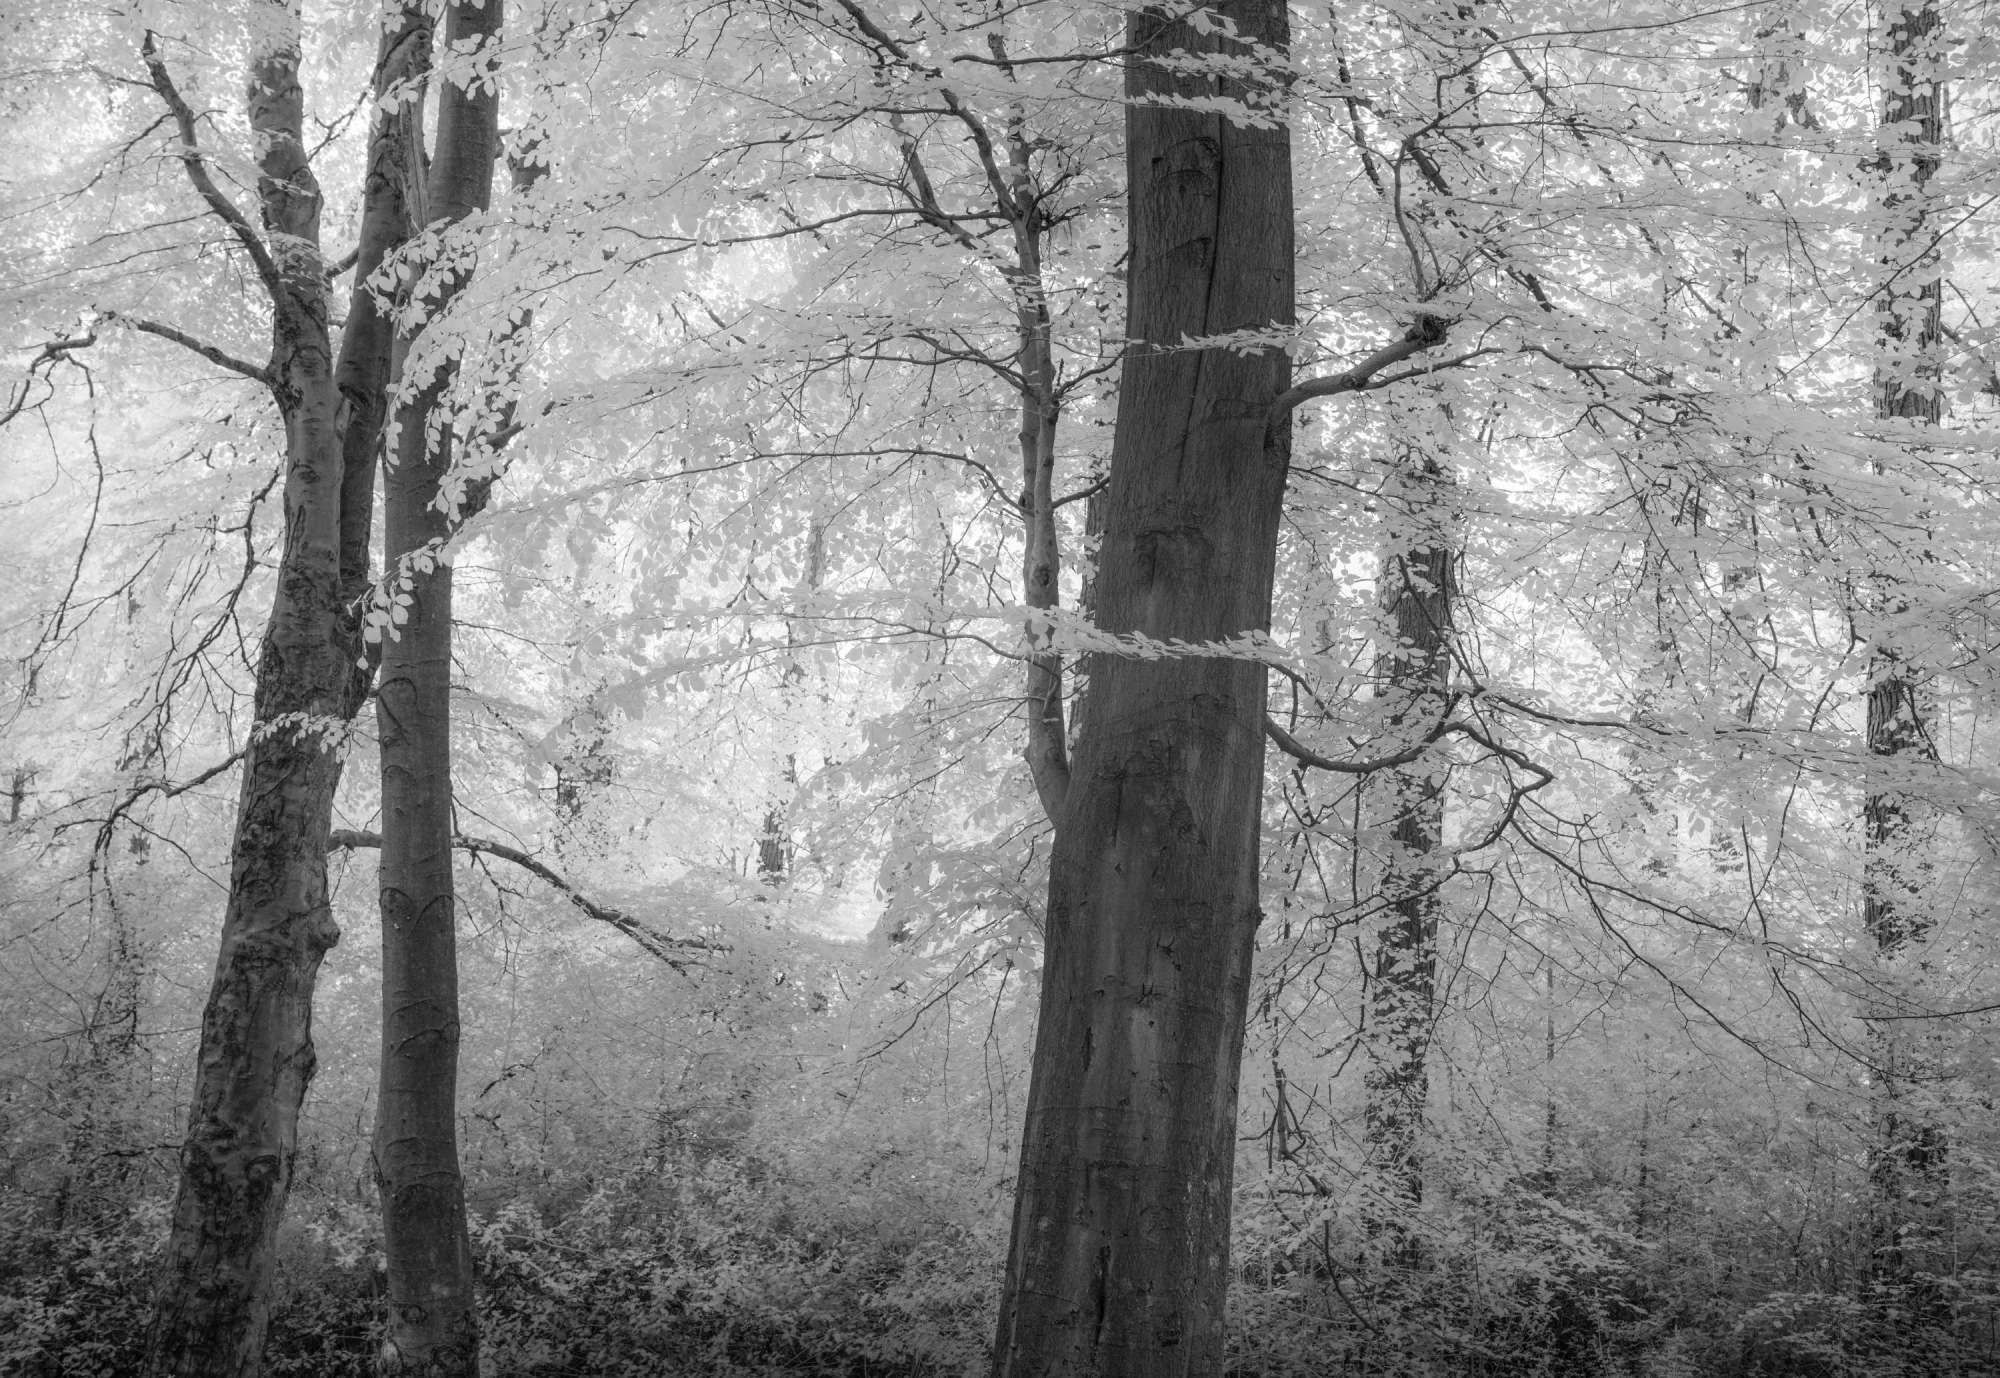
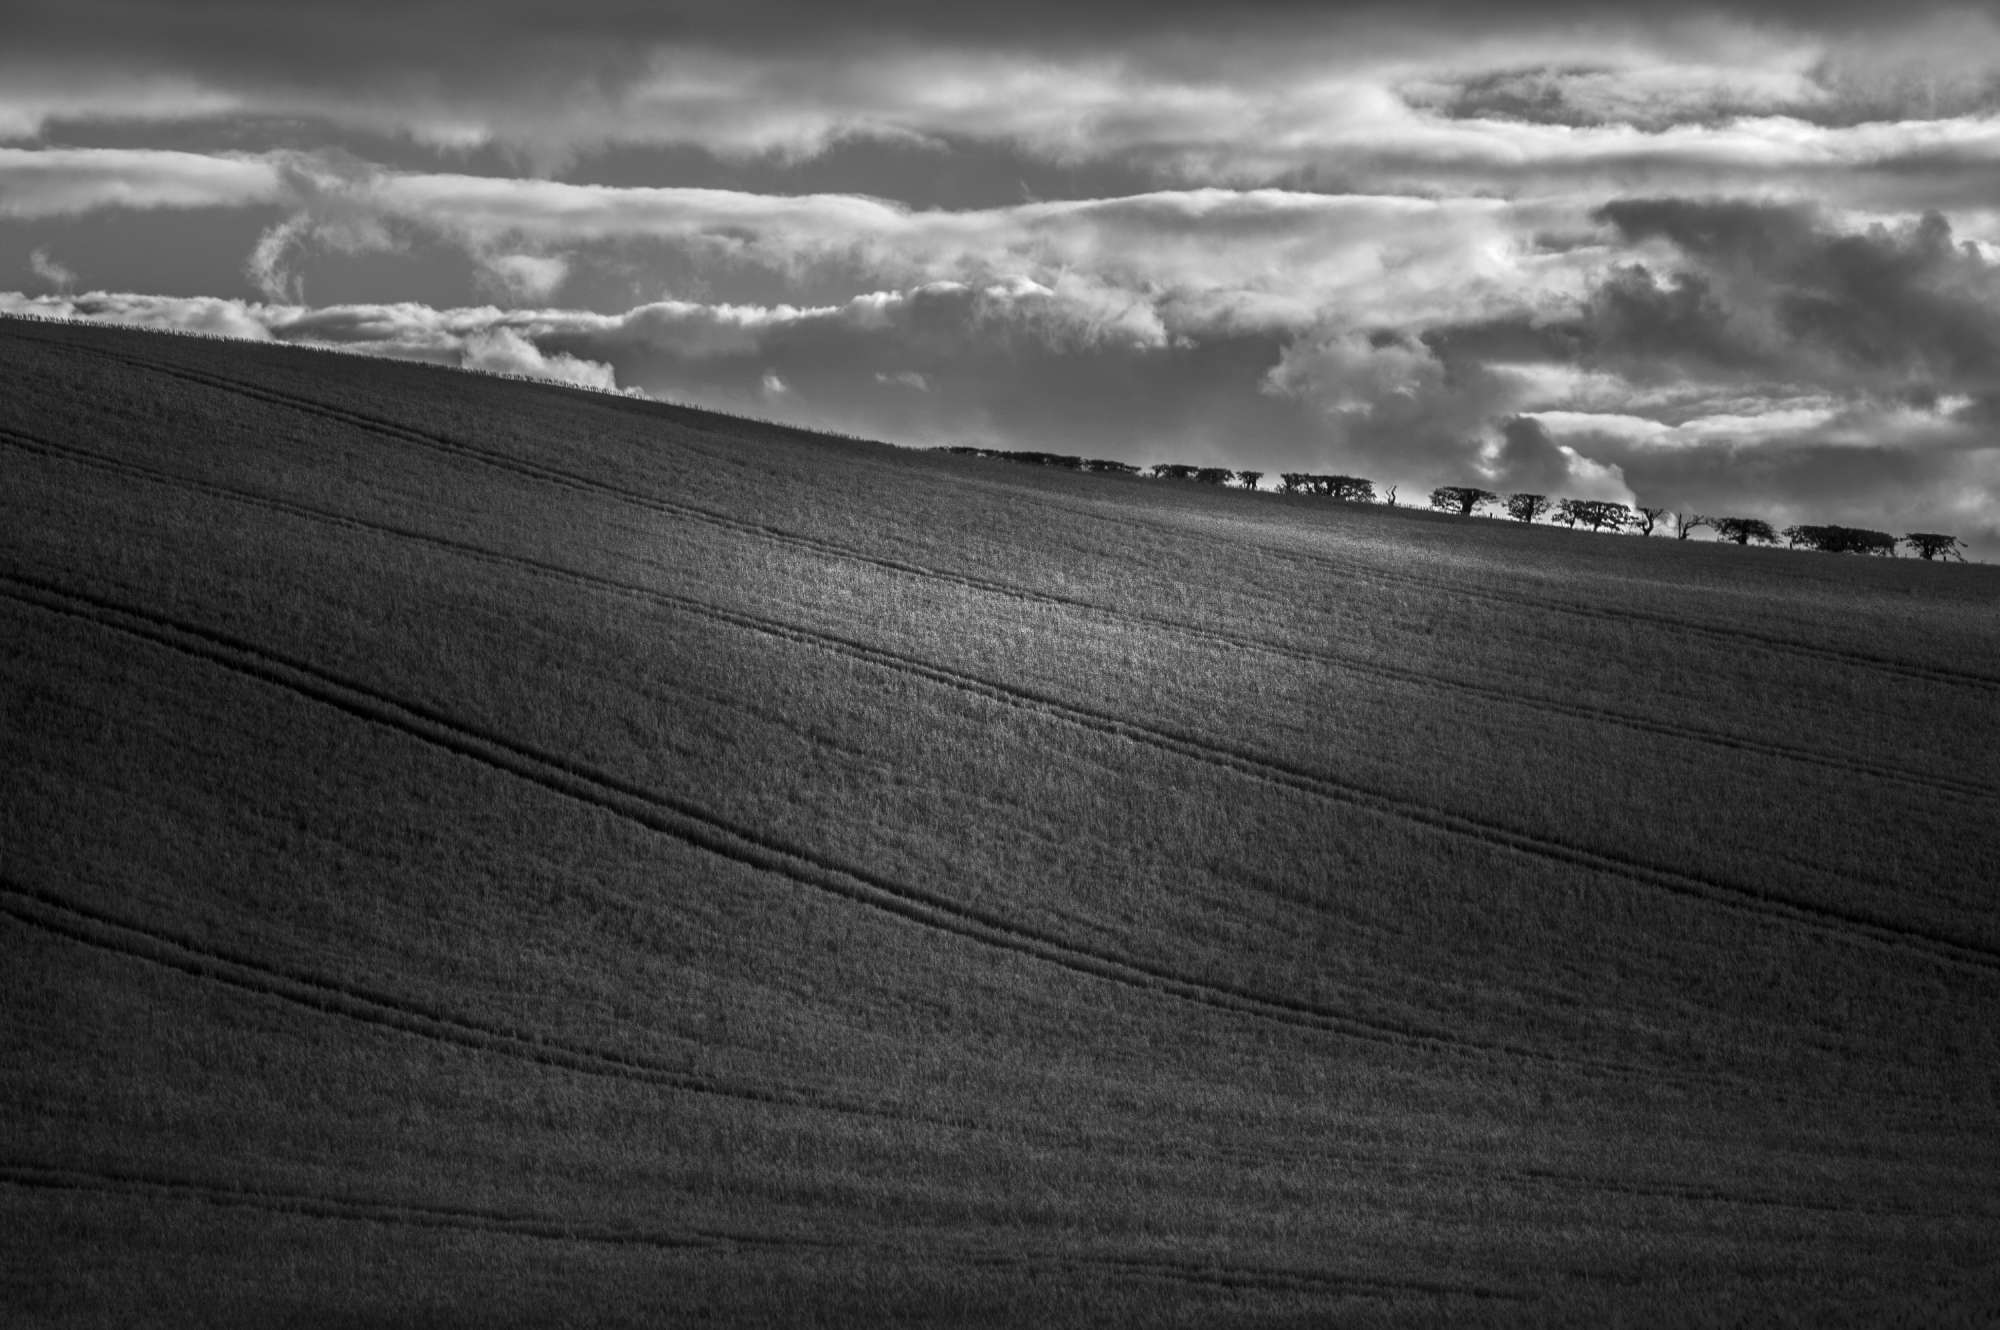
I began by heading out in what a lot of infrared photographers considered the poorest conditions, overcast days with hardly any direct sun – in fact, I was discovering that virtually no sun at all gave me the tones I wanted. I also soon discovered that the use of filters became almost redundant. Because of the narrow histogram and the way the camera records a narrow bandwidth of light, there were hardly any situations where I felt the need to fit a graduated filter, as the highlights were recorded beautifully. One of the frequent challenges to photographing trees is the dynamic range of the subject.
Working with an IR converted camera that essentially sees what we cannot, poses challenges when you are trying to standardise your approach. I soon learned that the slightest introduction of sunlight, even soft sunlight, would throw the exposure to the right instantly, even if this was by no means apparent to the naked eye.
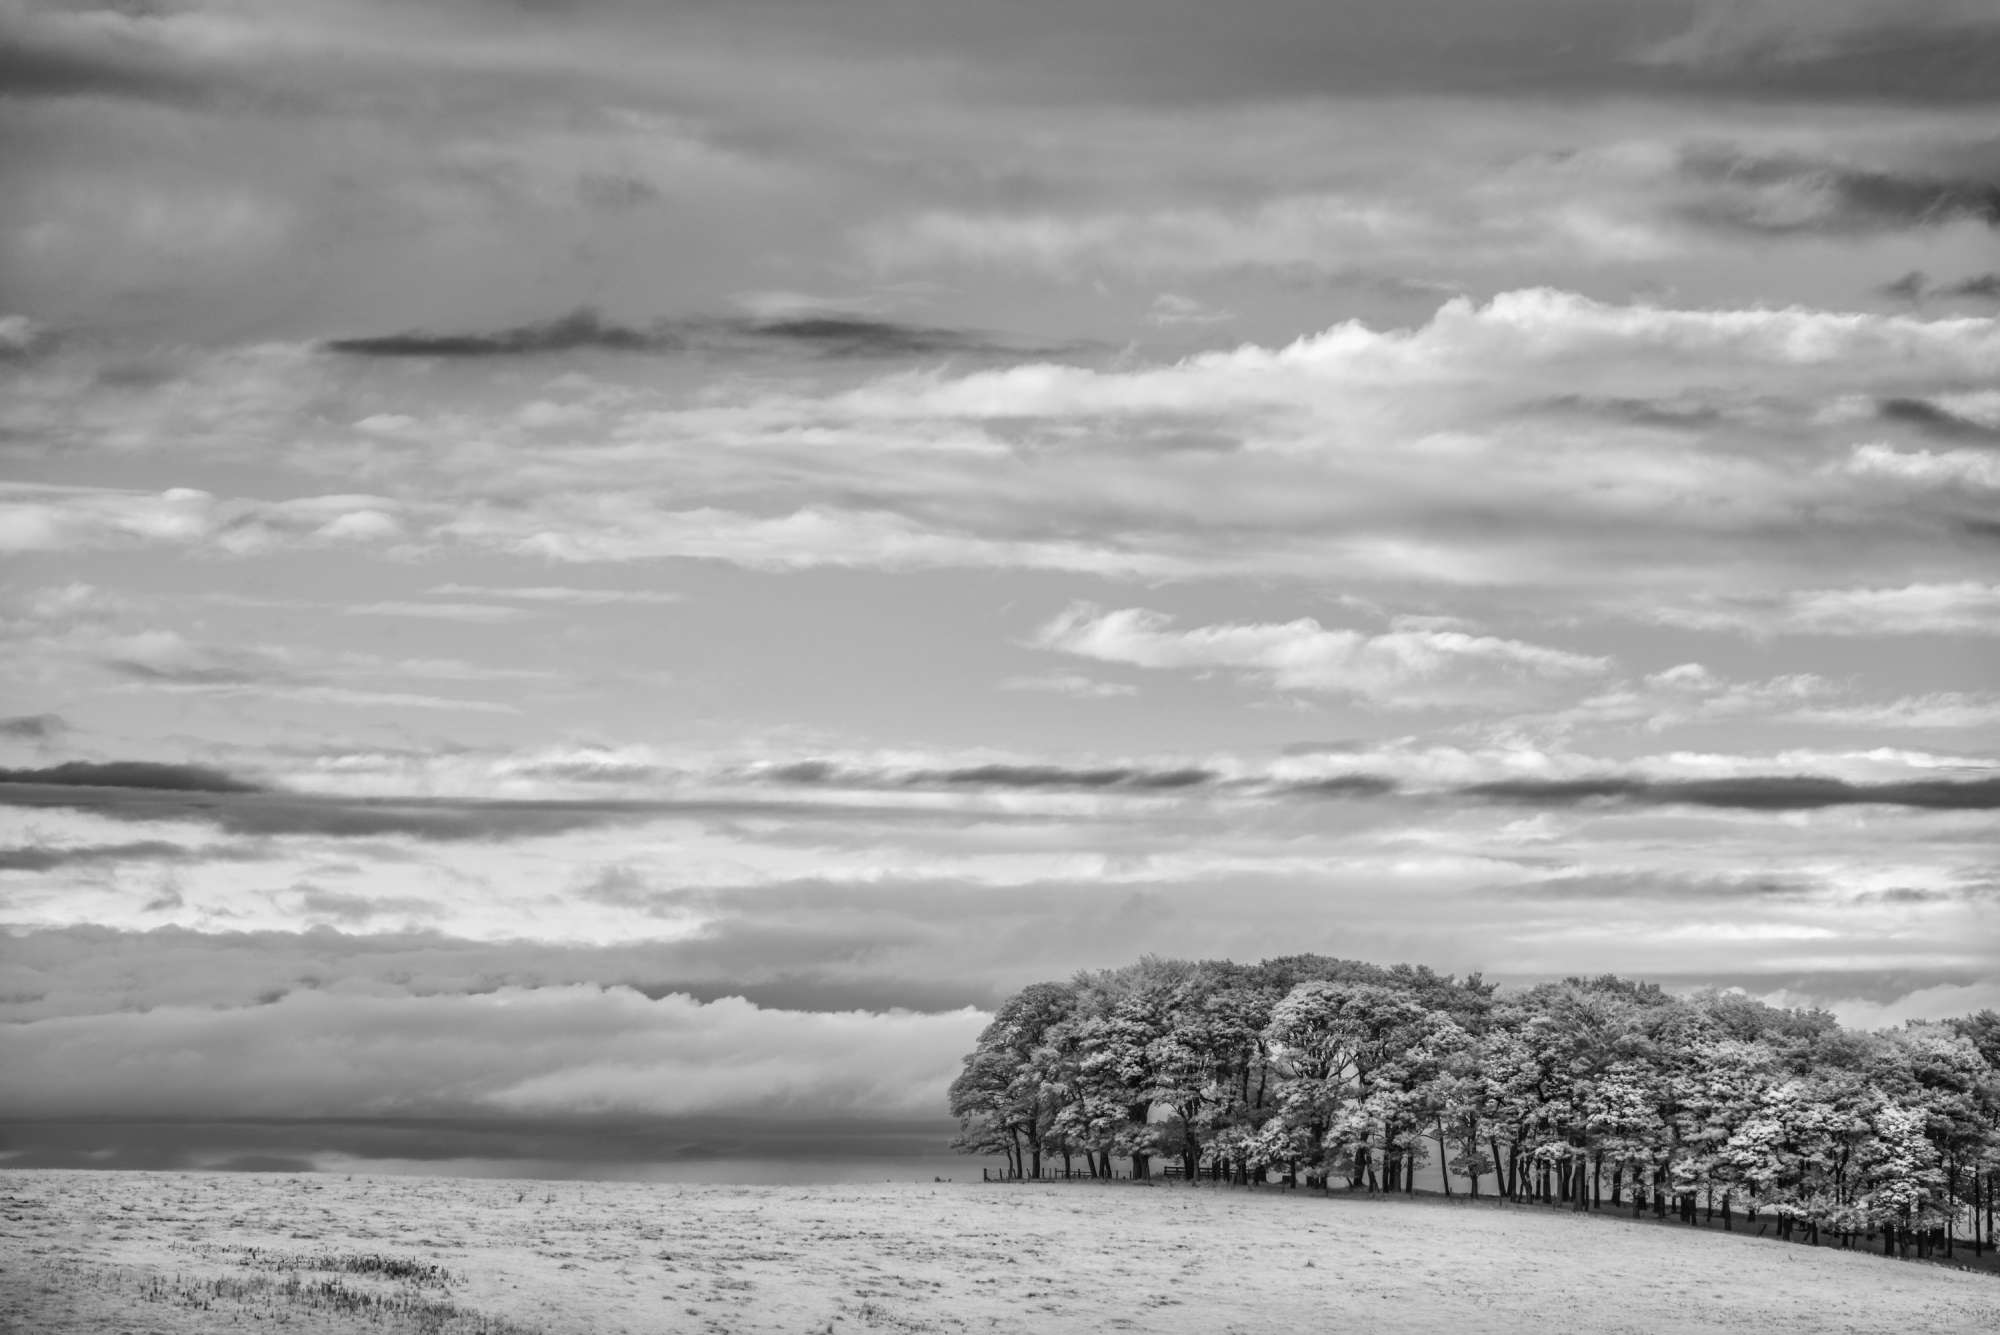
Subtle light is slightly exaggerated by infrared, resulting in an image that displays beautiful luminosity in the highlights without the overbearing shadows associated with strong light. Therefore, if you can understand these subtleties and learn to ‘see’ them, you can capture fleeting moments of light that IR will render as sparkling and retain shadows with rich luminosity.
The problem was the light! As ridiculous as that sounds, that was all that it was. The brighter the day and the more prevalent the sunlight, the brighter the highlights, and I would then have a struggle on my hands when it came to processing the files. The other aspect of infrared that fascinated me was the narrow bandwidth of light that the camera captured; the histogram was narrow, which led me to consider the flexibility of such a file if exposed in more subtle conditions. One afternoon, I was driving through Applecross in the Highlands of Scotland when a storm was building across the Inner Sound, and the Isle of Rona and Isle of Skye were slowly vanishing in the approaching cloud. Although I had decided that if I were to explore infrared again, it would have to be in ‘quieter light’, this seemed to be taking things a little too far, but I was wrong.
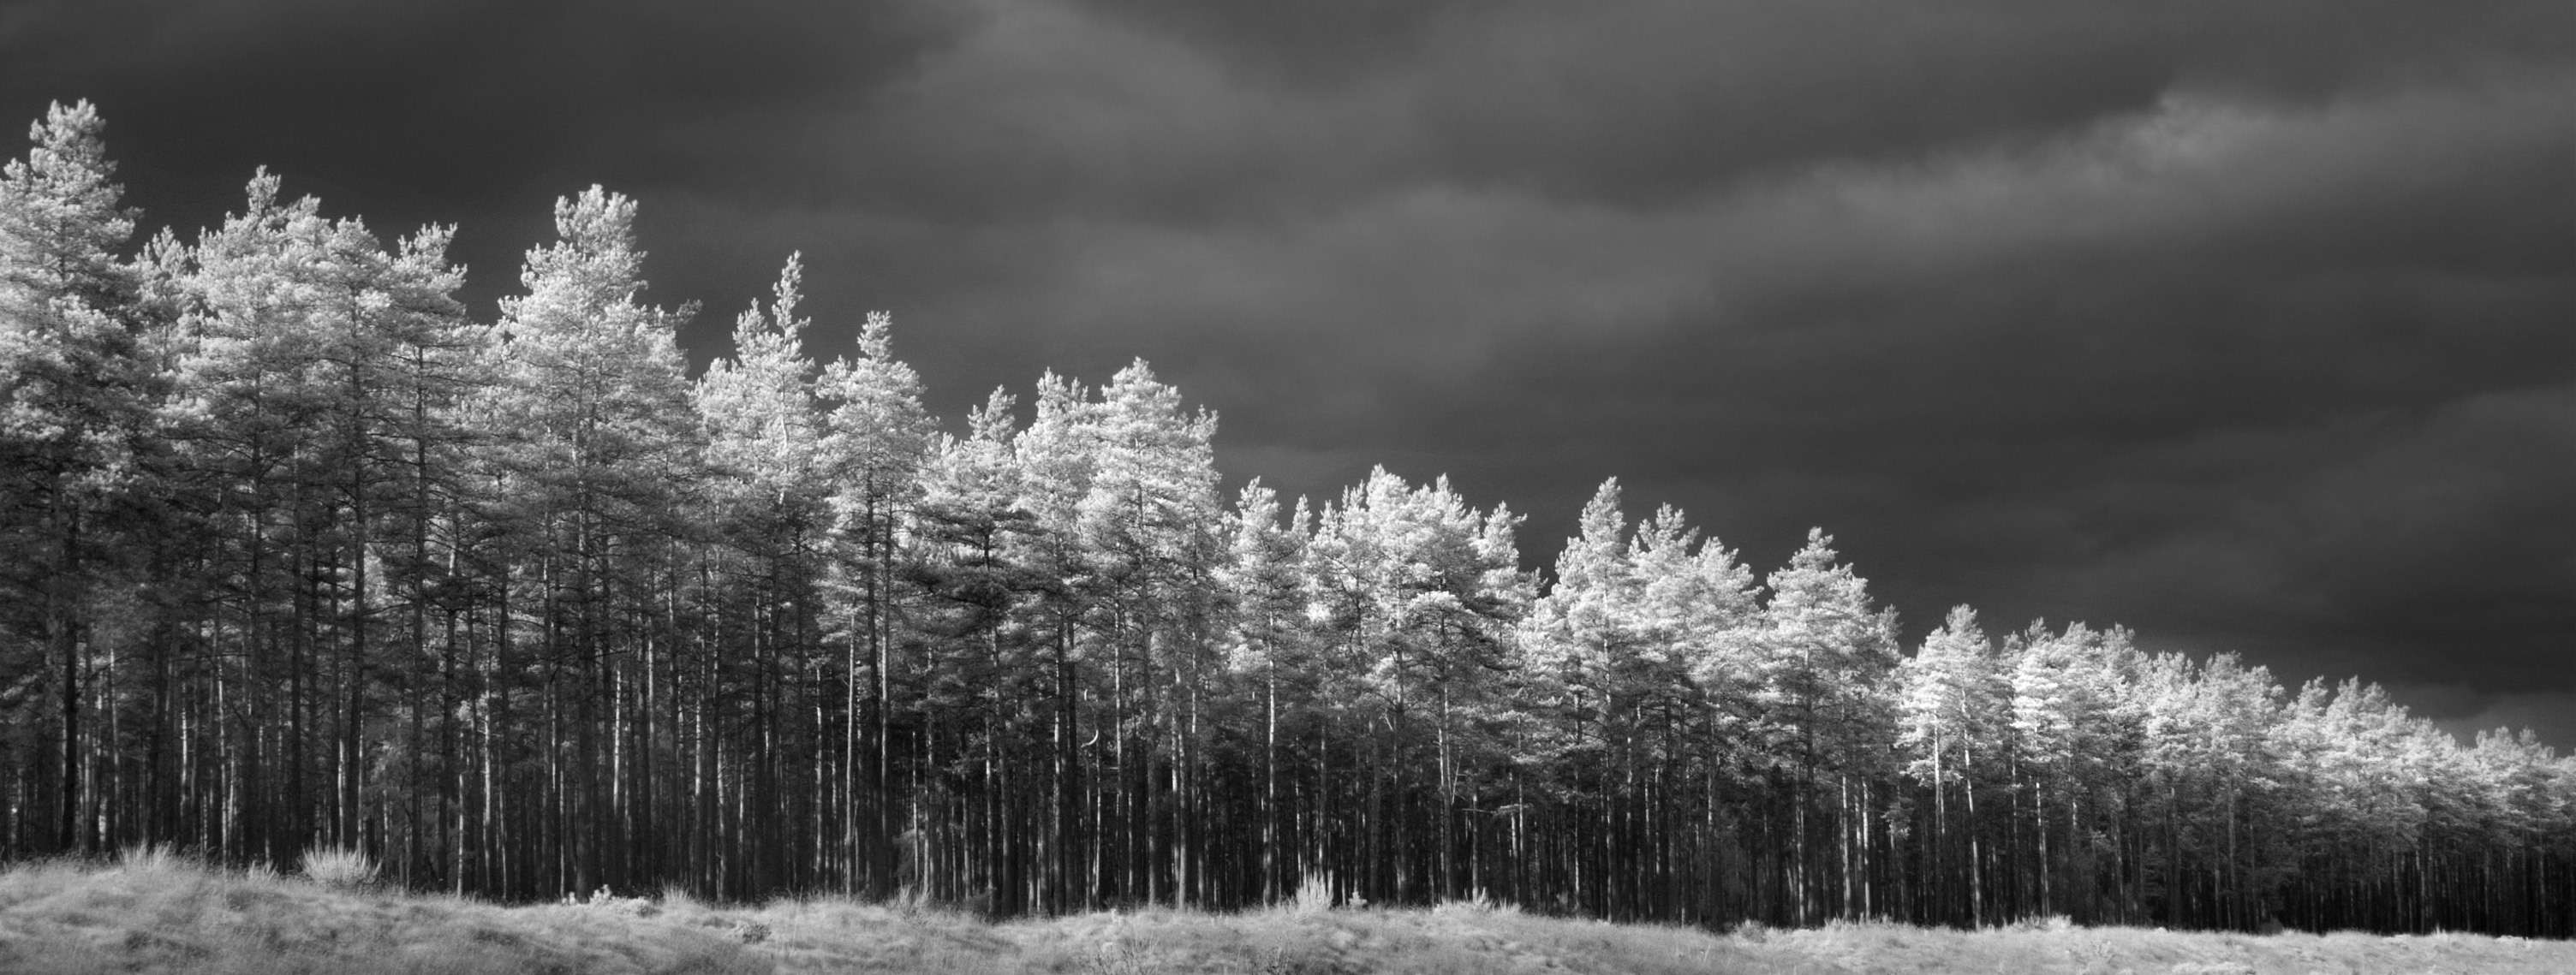
The composition was simple. Looking out over a small headland towards Inner Sound in the background was the approaching storm, and situated in the foreground was a small stand of pines. Without any filters at all, I placed the camera on my tripod and made the exposure. When I got back that evening, I looked at the file, and after it was converted to black and white, I was faced with an image of beautiful tones and subtle greys. The storm clouds were rendered wonderfully, and the pines had a subtle pale glow as the low levels of infrared light had been reflected from the many green needles on the pines. It was apparent that if I had taken this same composition on my D800e and converted it to black and white, I would have had a challenge with retaining the brighter detail in the skies set against the darker shadow tones of the pines.
Remember to use your camera as you usually would, and feel free to use autofocus and the camera’s internal light meter. One of the most important things to remember when shooting in infrared is not to expose fully to the right, as photographers are often told. The reason for this is that the histogram from an infrared converted camera is narrower, and shooting to the right will push many of the image tones into highlights, which are difficult to separate later in image editing. My recommendation is to keep your histogram distribution out of the last right quartile of your histogram band.
Use the custom white balance that will be set by the technicians who converted your camera and never alter it. If your white balance is altered or if you set wrongly your image will appear a strong red or blue which makes image evaluation on the back of your camera and processing tricky. Your preview image and raw file should display a sepia tone. Avoid vast areas of green, such as fields of barley or grasslands. These contain huge amounts of chlorophyll and will offer virtually not tonal variation in your finished image, appearing as a block of grey.
If you are used to looking at a scene where you would ordinarily reach for your graduated filters, firstly, try an exposure without them. Remember, the camera sensor cannot see all the wavelengths of light your eyes are seeing and will probably cope very well without them enabling you to simplify your approach. Lastly, when you convert your image file to black and white, the initial image you will be faced with will look pretty lifeless and flat. Do not give up here. Look at it as a benefit where you are not grappling with highlight and shadow problems, and continue to tease them out, arriving at a beautifully toned final image.
Infrared for me is the platform that has replaced my beloved black and white film I used for over thirty years, and my converted infrared camera goes everywhere I go, and I can switch between colour and infrared as and when I choose, which for me, is complete freedom. If you ever search online for infrared photography, the results will mostly look the same. Photographs made in sunlight with deep blacks and bright whites. I am not stating there is anything wrong with this, but I am convinced that there is so much more to infrared than a single approach in the same way there is not one approach to making any black and white photograph.

